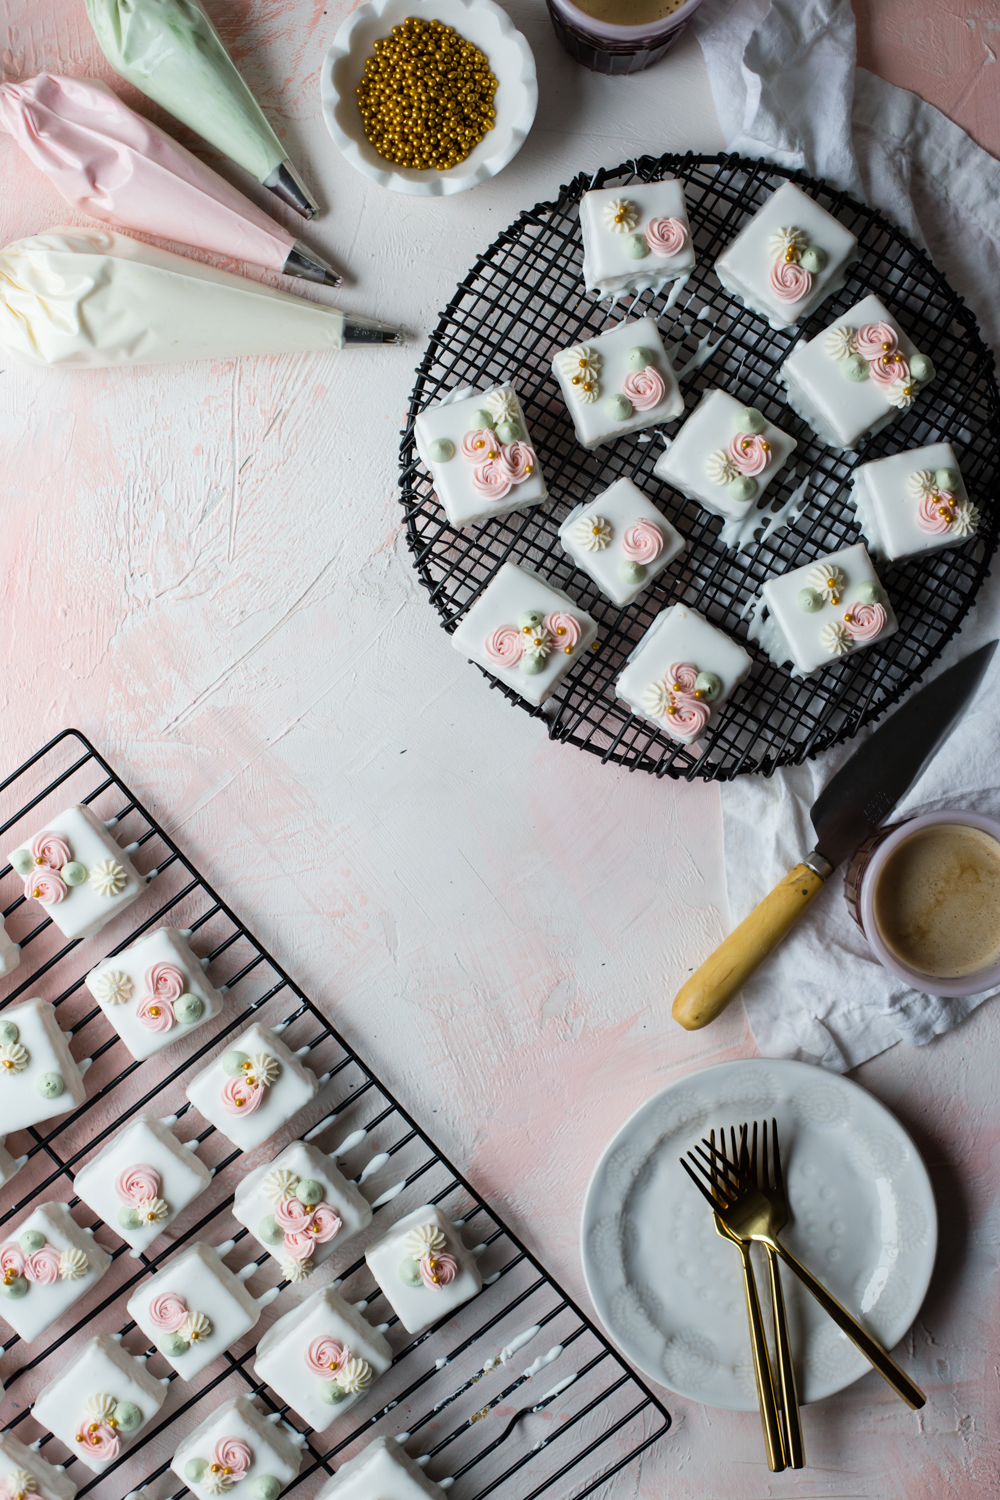
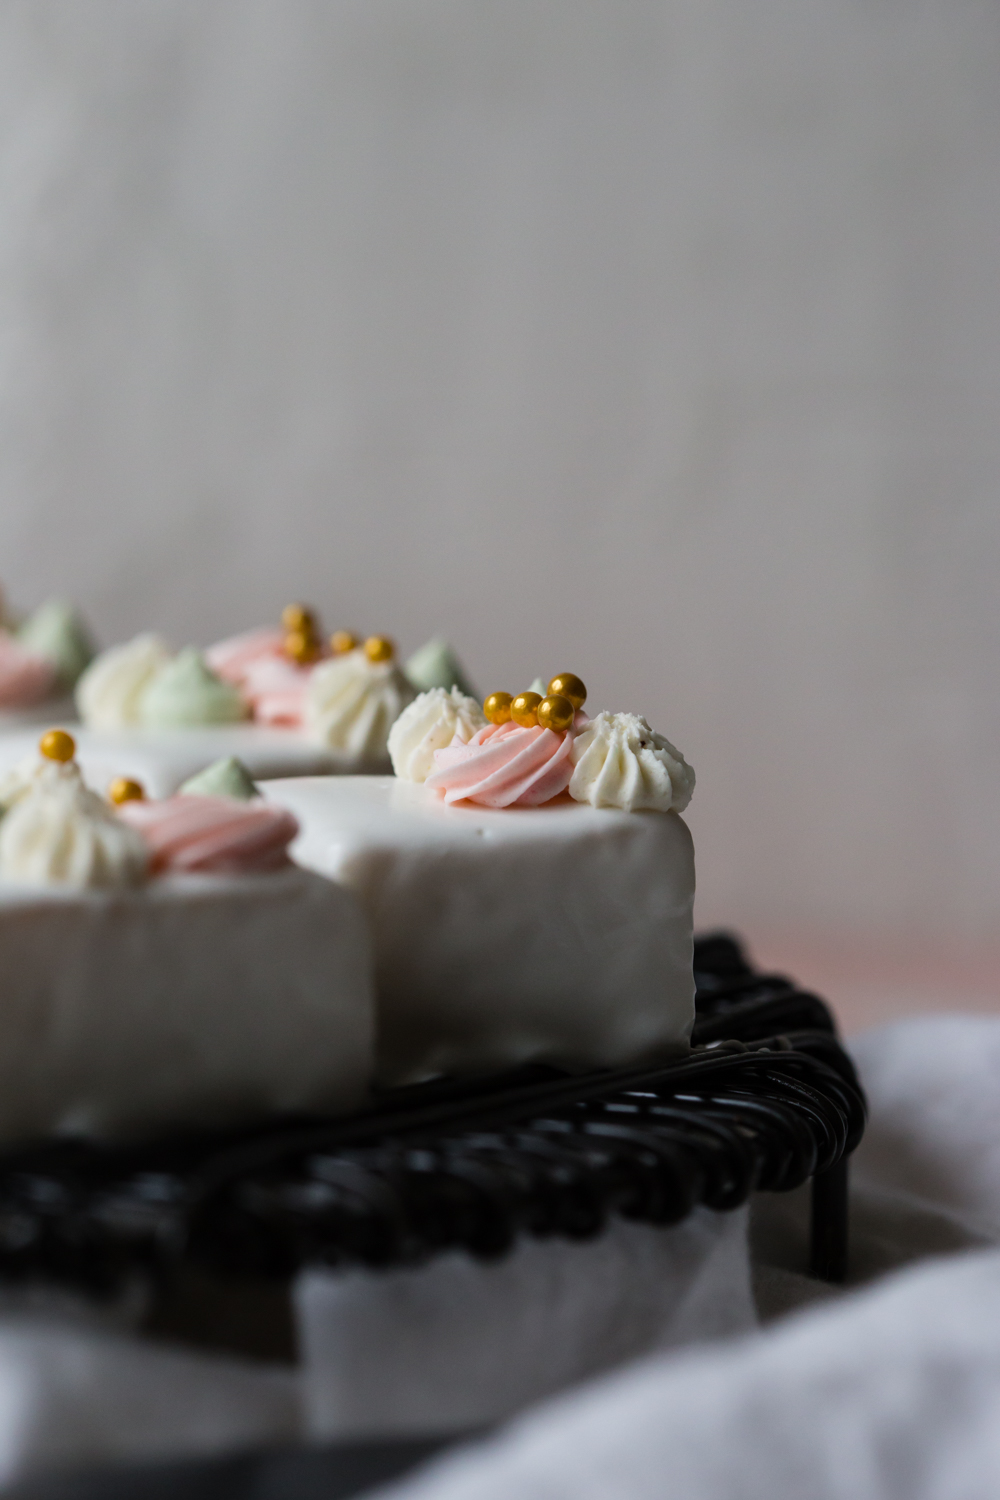
While we’ve got out our notepads and pens, scratching down ideas for May 13th, I thought I’d give you my Mother’s Day recipe a little early this year. These Vanilla Petit Fours definitely take planning and some time for a proper execution. And, they are doable, so very doable. So, along with this recipe, I’m also giving you my tips on how to make the perfect petit four every time!
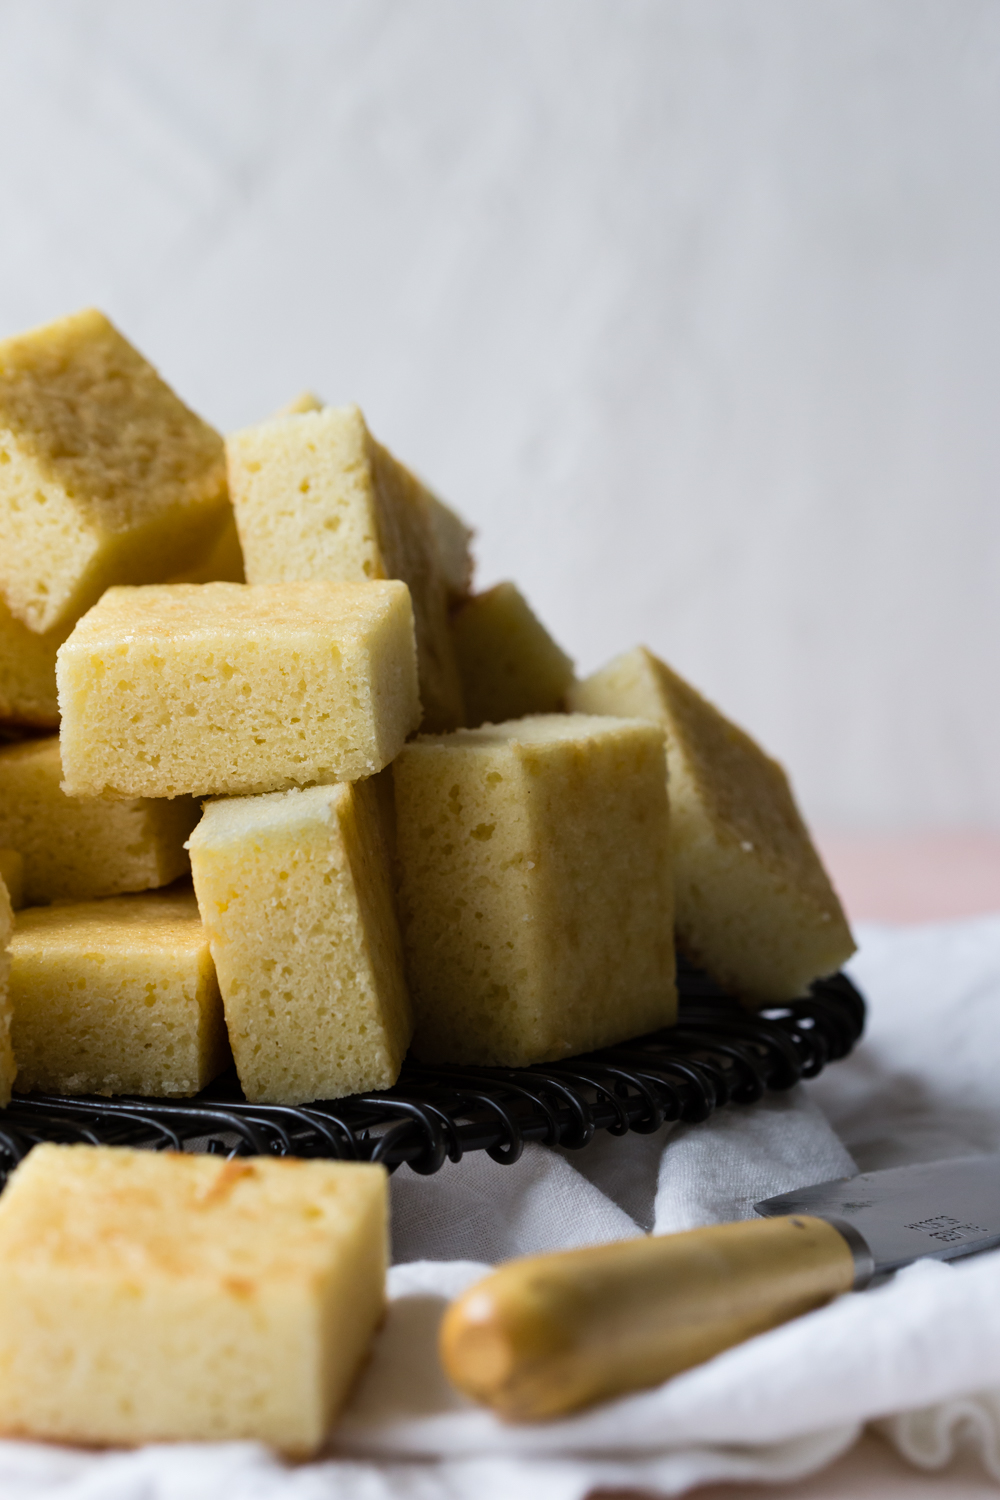
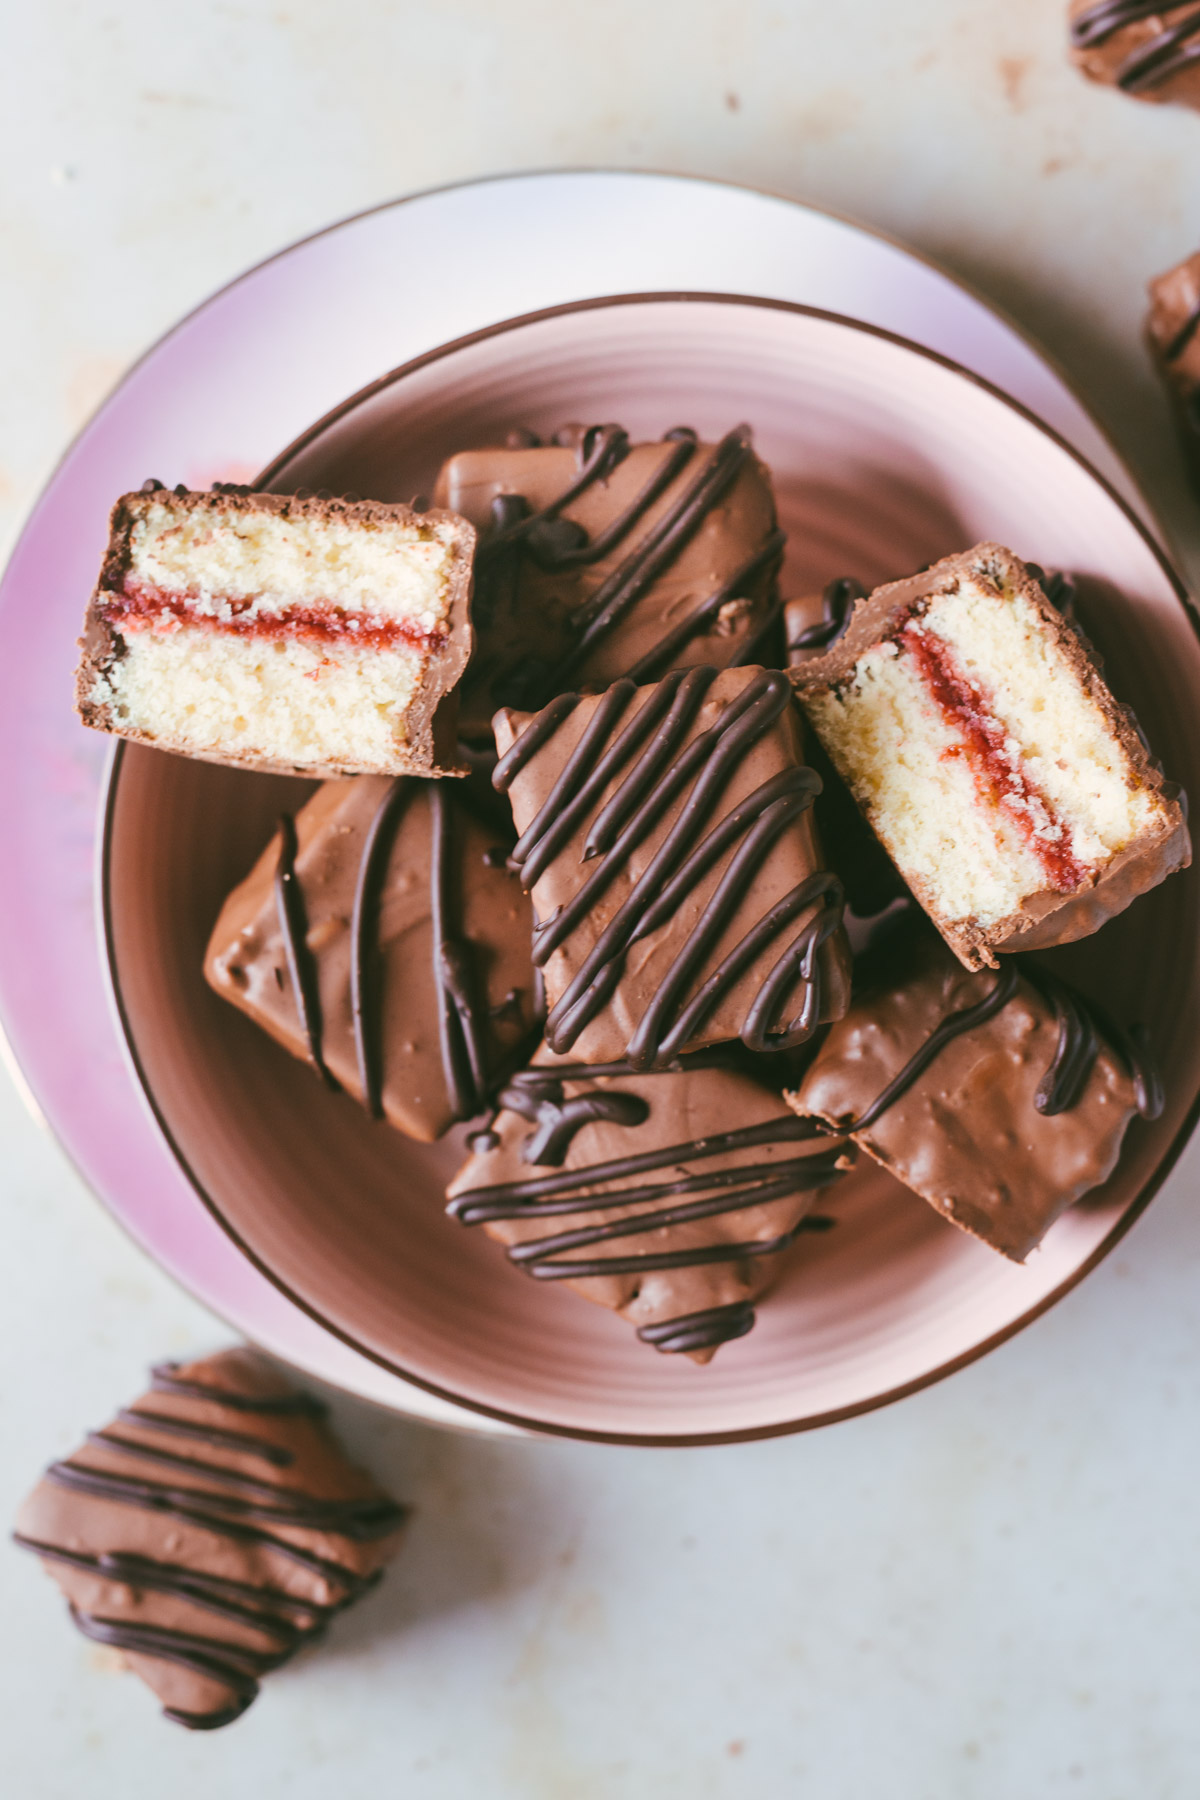
- Cake density is paramount. That’s why I always use a pound cake recipe for my petit fours. It provides great density and fullness that a light sponge cake just can’t compete with.
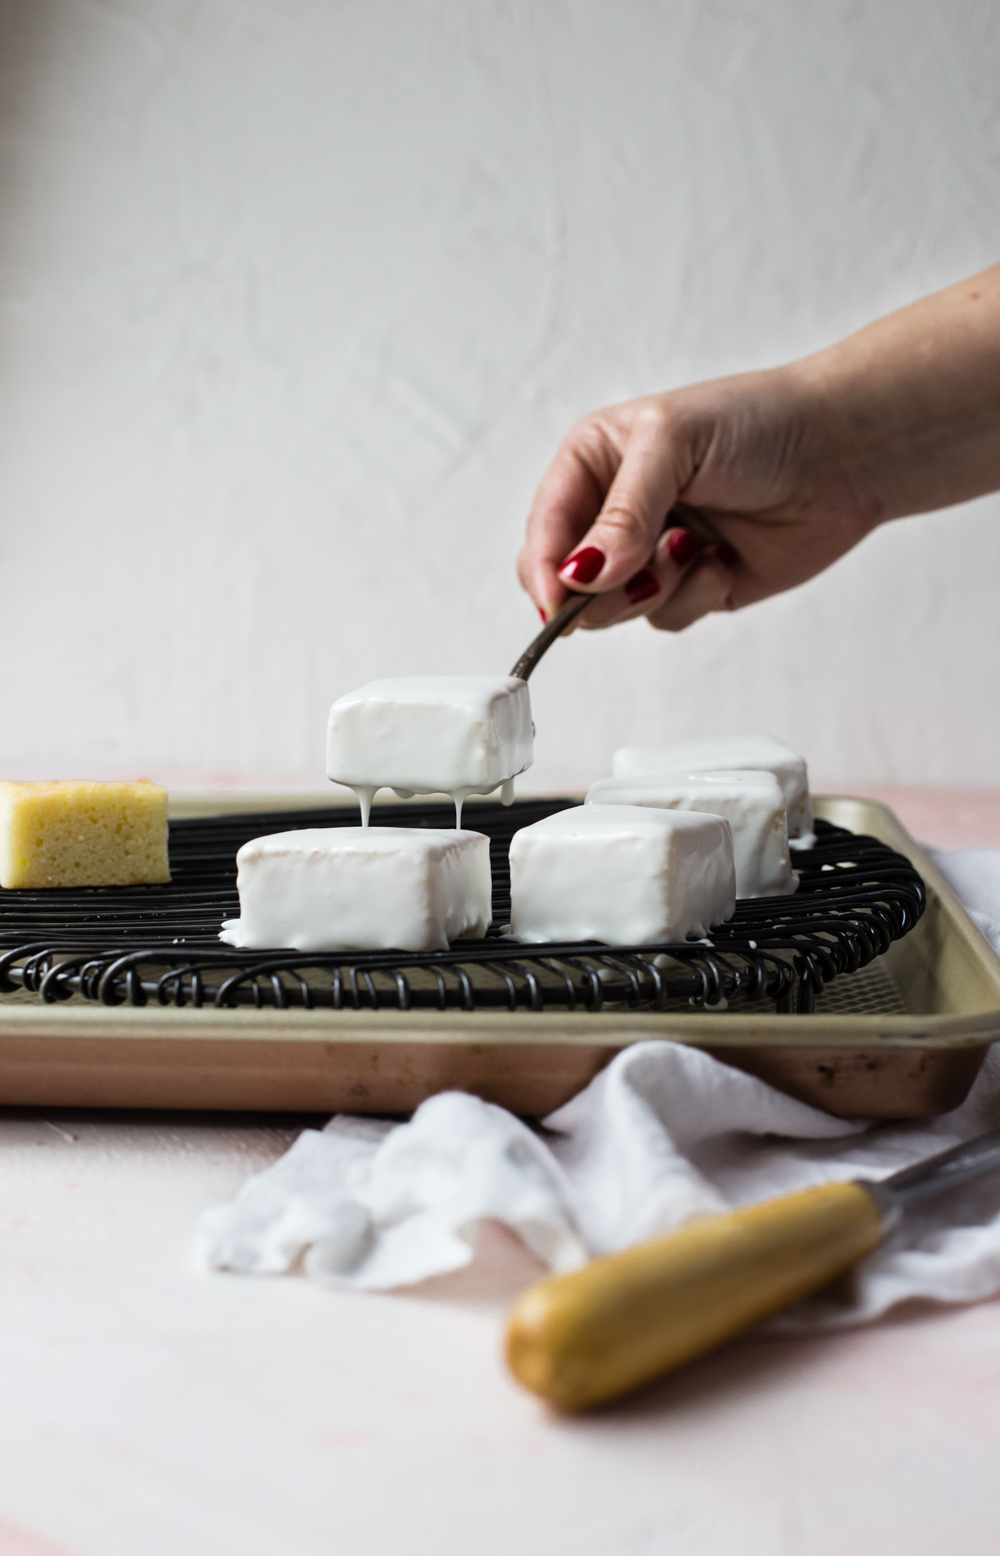
- Definitely, and I say again, definitely, freeze these little cake squares before dipping them into the pouring fondant. Pouring fondant is just a fancy term for white chocolate icing.
- Keep the pouring fondant warm and reheat as necessary to ensure a perfect coating. I only needed to reheat the white chocolate fondant once during the dipping process. (calm down internet… this is a simple/cheat/easy version of pouring fondant… everyone… it’s going to be okay)
- If you decide that you HAVE to have filling in your cakes, I suggest only doing a very small layer. Just trust me on this one.
- Make ahead! People, by about day three of these cakes hanging out in my house at room temperature, they hit their stride. Don’t be afraid to make them up to five days in advance! Makes them even better.
Okay, so now that we’ve got the logistics out of the way, you can execute these Vanilla Petit Fours any way your heart desires. You can bake them not just for Mother’s Day, but also for a tea party, for an event, to sub for boring cupcakes, or just because you need to stress bake. Vanilla Petit Fours just seem to be something that I make on Mothers’ Day, but you do you boo!
As many of you know, Mother’s Day isn’t always the easiest day for me to celebrate. Not that I don’t have a wonderful mother, but it’s more about the fact that I’m not one. The past four years have been rough, but I seem to be climbing out of the valley and into healing.
While I usually like to take this time to encourage my fellow struggling mothers-at-heart; this year, I’ve stumbled upon acceptance. I’ve never really thought I’d ever find this place, and I’m still wary of it’s presence. What does it mean? Will this stay forever? Is this my forever? I don’t have the answers. But, instead of questioning it, I’m allowing myself the freedom to be happy. I’m allowing myself the joys of walking in a path predetermined for me.
I know this: a lot of people hurt on this day for a million unique reasons. But, if you’re like me, and you are in the thick of infertility, I wrote this post last Mother’s Day and I hope it can help you as much as it helped me. And, even though I find my heart mending in places I thought would stay open and raw forever, this day will always feel a little heavy. So, I’ll acknowledge it and bake to fill the void of what might have been.
So, bake on my friends! Bake through the happiness, the pain, the celebrations. Bake because you can. Bake because it gives you control. Bake because you love the person you’re doing it for. And, definitely bake these Vanilla Petit Fours, mmkay?

Vanilla Petit Fours

Want to know how to make the perfect Vanilla Petit Fours? They are easier than you think if you follow these simple tricks. Recipe included!
- Prep Time: 3 hours
- Cook Time: 30 minutes
- Total Time: 3 hours 30 minutes
- Yield: 36 servings
Ingredients
|| Cake ||
3 sticks unsalted butter
3 cups granulated sugar
5 eggs
3 cups all-purpose flour
1/2 teaspoon fine salt
1/2 teaspoon baking powder
1 cup whole milk
|| Glaze ||
1 cup white chocolate chips
4 cups powdered sugar
1/4 cup light corn syrup
1/4 cup hot water
1 teaspoon vanilla extract
Americolor bright white soft gel paste
Instructions
Preheat oven to 350 degrees.
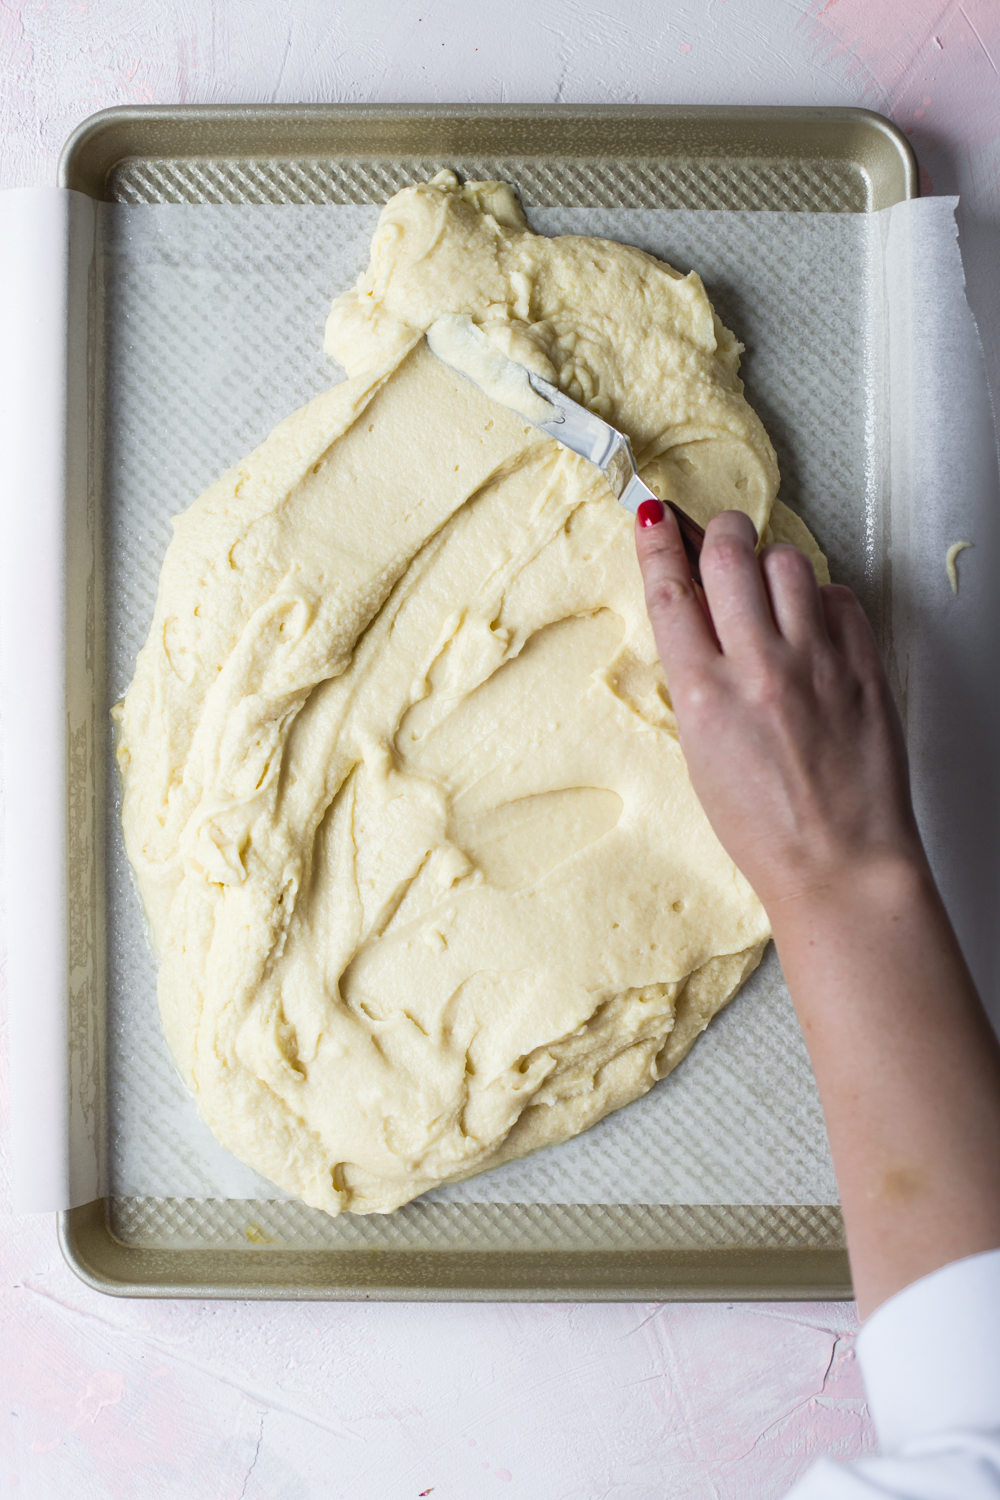
|| Cake || Using a mixer, cream butter and sugar together. Add eggs, one at a time, beating after each addition. Sift dry ingredients together in a bowl and add to mixer bowl alternately with the milk, starting with the flour and ending with the flour. Add the vanilla. Pour into a greased sheet pan and bake for 25-30 minutes. Baking time can vary depending on the baking pan’s size and thickness. Keep a close eye on the cake as it bakes and remove when done.
Once cake has cooled, cut into 1-inch square shapes and place in the freezer for about two hours until set.
|| Glaze || Melt white chocolate in a double boiler. In a separate bowl, sift the powdered sugar, and add the corn syrup and hot water and stir until smooth. Add to the double boiler with the melted white chocolate and fold. Continue to cook until the mixture reach approximately 100 degrees. Add in the Americolor bright white. You will want to add some kind of food coloring to the mixture or it will be too translucent.
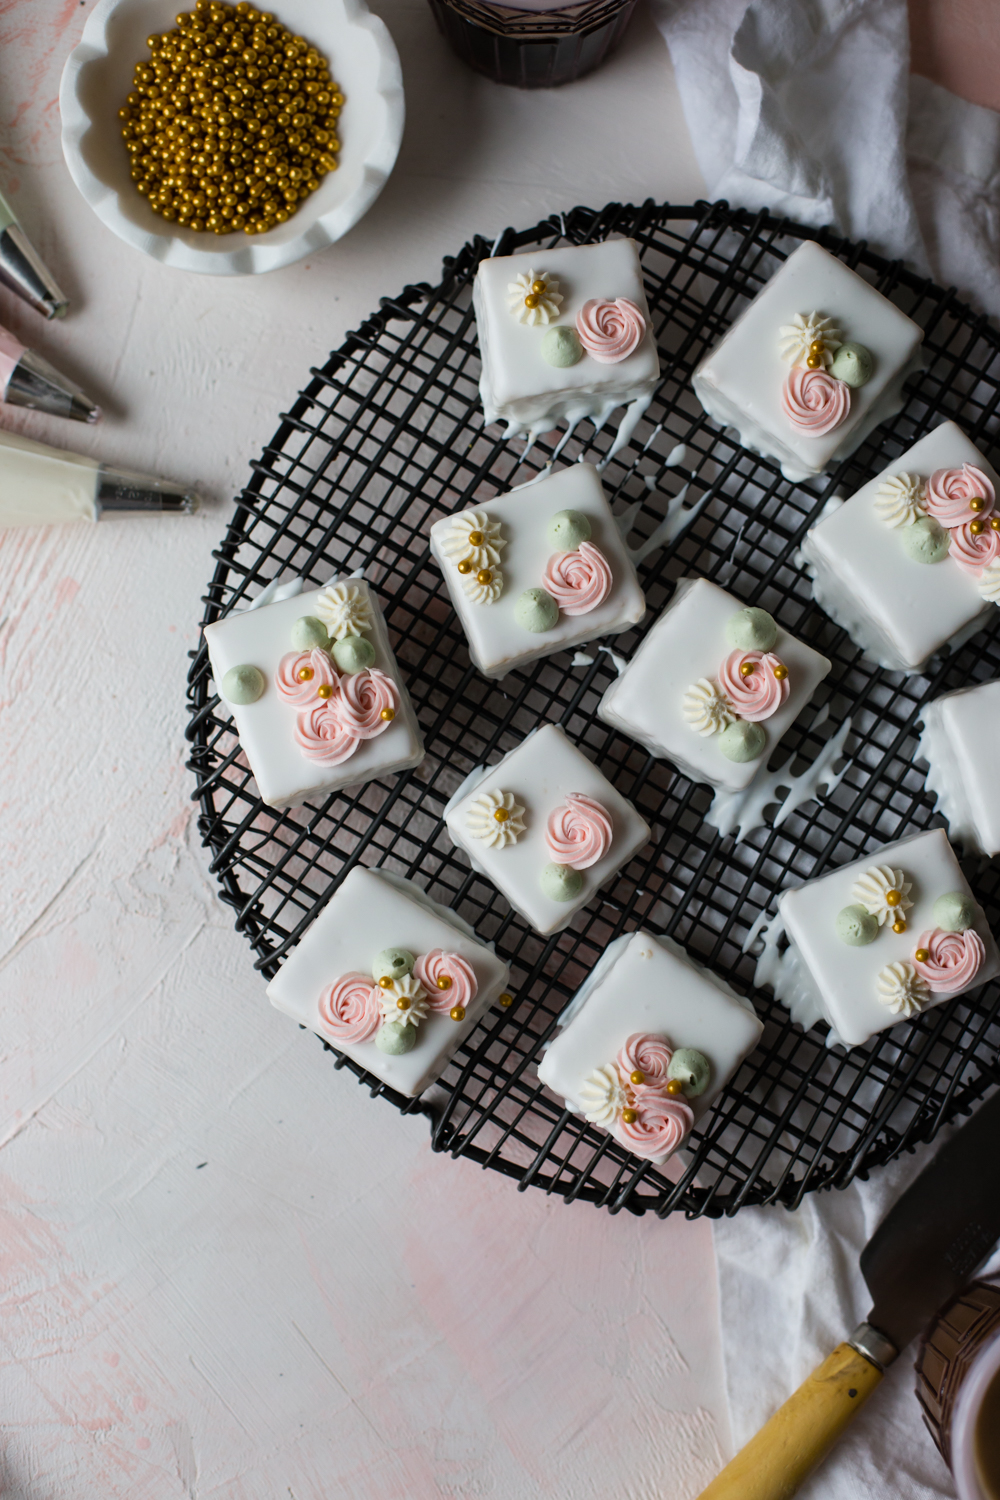
Drop a frozen petit four cake presentation side down into the icing and turn over with a fork making sure the whole cake is coated. Remove with same fork and set over a clean cooling rack with parchment underneath to allow for drips. Repeat with all of the cake pieces.
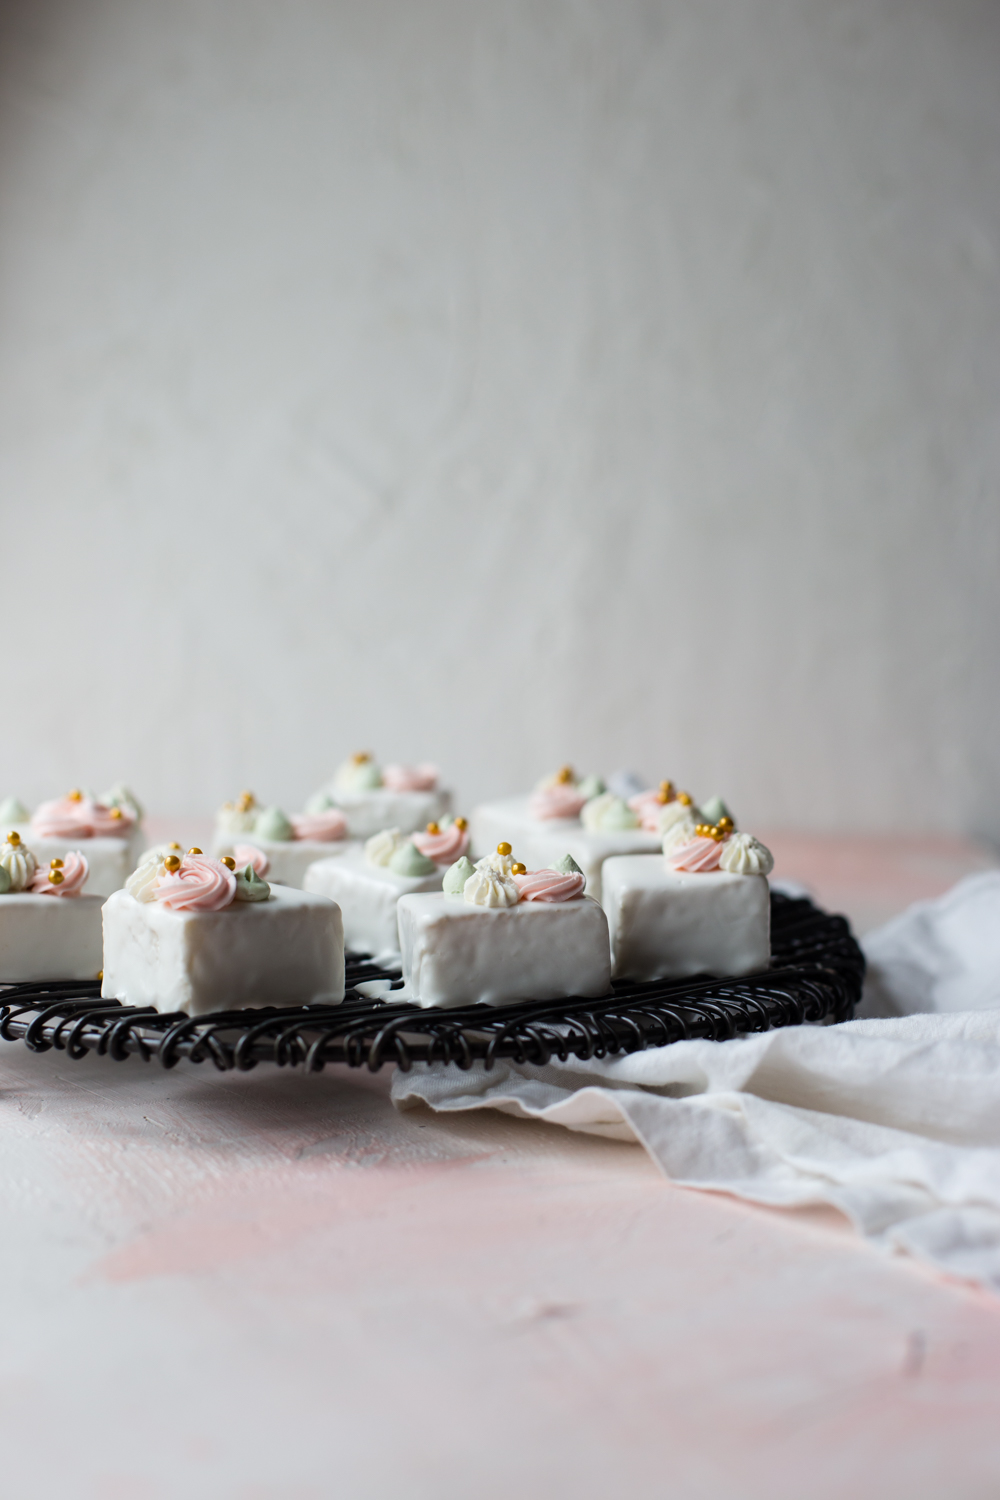
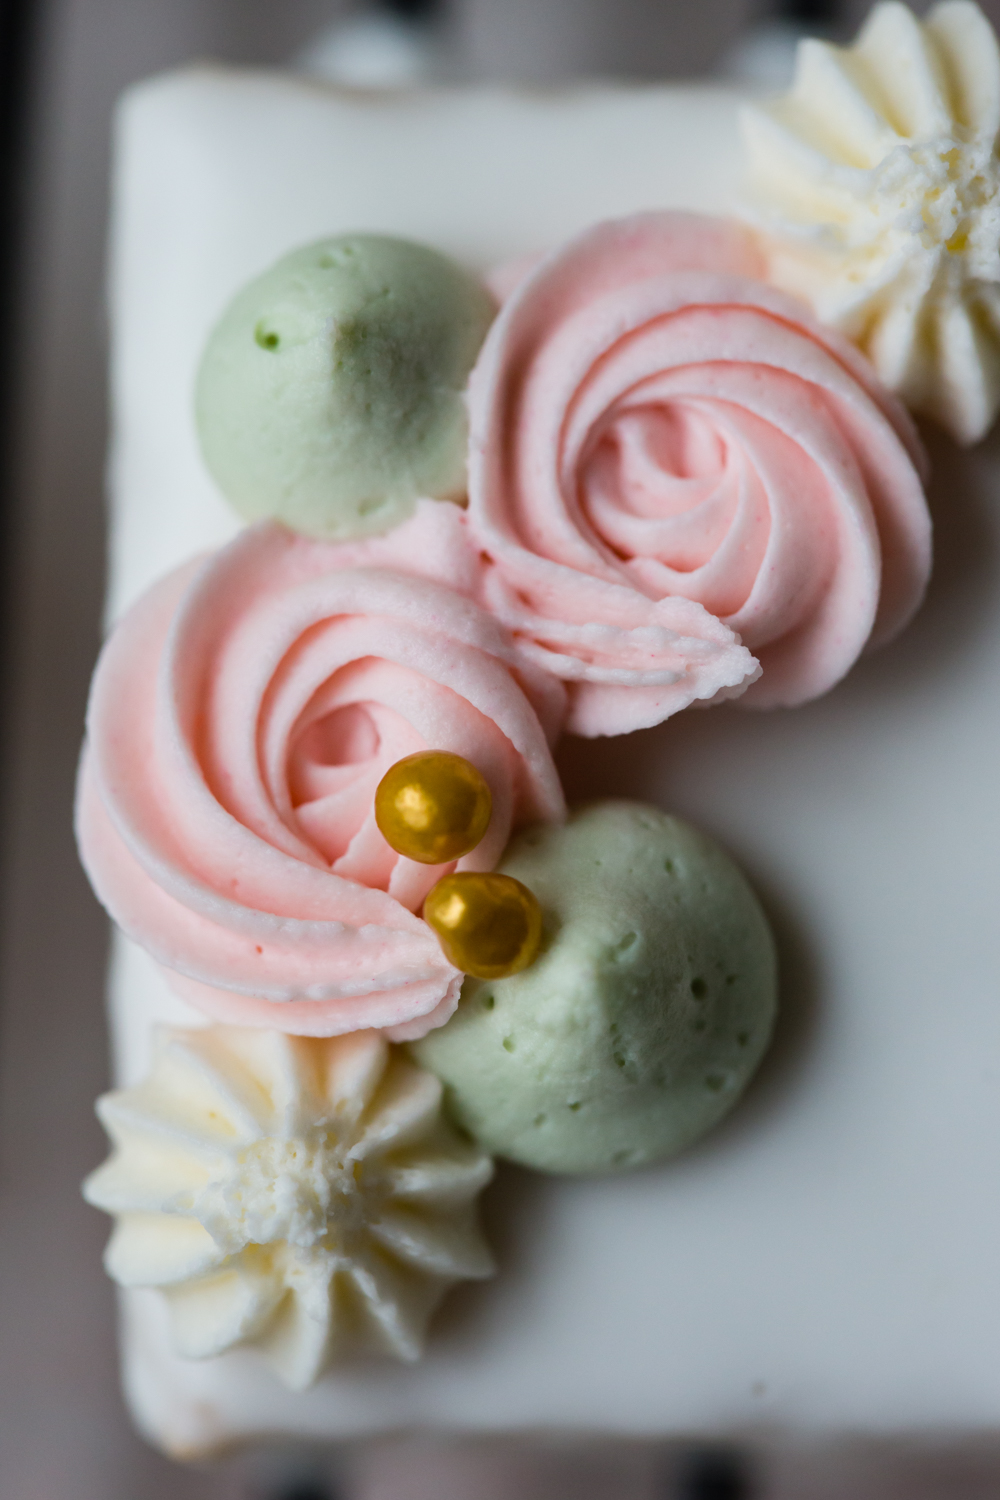
For frosting embellishments, use your favorite frosting recipe and pipe designs on top of petit fours. An American Buttercream works best since it will set along with the icing.

Your words and work are beautiful Karlee!
Awe, Mary!! Thank you so much!
Okay, these are so cute! You are an incredible woman in more ways than one – keep sending us your words of wisdom and hope…. and obviously your tasty creations! xx
Oh my goodness, Laura! thank you so much! I will do it until my last breath! 🙂
I’m going to be doing these for a bridal tea wedding shower later this summer. You have some great tips here that I think will make these easer than usual for me. Thanks!
Love you, Karlee.
love YOU, Carol!!!!!
I usually make petit fours with 3 layers baked in quarter sheet pans. What size sheet pan did you use for these single layer petit fours?
I’m wondering if this cake recipe will make enough batter for 3 layers. Thanks in advance.
Hey peg! I use a typical cookie sheet (15×21). It should rise to a 3/4 – 1 inch thick cake. Hope this helps!
I made these for my granddaughters 10th birthday. The cake was absolutely delicious! I had a hard time with the icing, actually had to make a second batch because I ran out. They looked beautiful and everyone liked them! Lots of work but anything for my granddaughter Mae Lauren. We also love Jesus! Thanks for the post and gorgeous pictures!
We love Jesus too !! ✝️ and we are making these today!! It’s our family’s “arts and crafts” 🙂
I made these for my granddaughters 10th birthday party and the 9 little girls in attendance loved them! The cake was amazing! I had some difficulty with the icing, actually had to make a second batch because I didn’t have enough. Do you only use one batch? (I had around 75 petit fours) Thanks for posting! And we too are Jesus Lovers!
Yay, Debi! I’m so glad they loved them! I don’t usually need to make more frosting but that’s great to know! I’ll put it in the recipe card for future reference.
JC is the best!!! 🙂
I made these and they were incredible
YAYAYAYAY!!! I freaking love hearing this 🙂
These are beautiful!!! I just wanted to know, how should they be stored? I was going to fill them with chocolate ganache. Am I able to freeze them?
Thank you! Sorry for the late response! I haven’t tried freezing them but if they’re well covered I don’t think it should be an issue. (yum for chocolate ganache!)
Thank you for getting back to me! Sorry last question, should I store them in the fridge? If so for how long? I keep reading mixed reviews about storing them in the fridge. Or should they be in an airtight container at room temp?
Hi, I just made them and I had trouble with the glace, it came out very thick so it was difficult to coat the cake. Do you have any advise? Maybe add a little extra water?
Hey Sol! Yes, the glaze is very thick. To coat, you must do it at a warm to almost very warm temperature through the glazing process. If it’s still too thick, add some whole cream a tablespoon at a time until you get the consistency you like.
How much Vanilla in the cake?
Hey Sarah! Thanks for reaching out! 2 teaspoons.
Karlee
How much of the white food coloring do you usually add to each batch of frosting? Thanks!
If I’m using it, it’s probably just about a teaspoon. It just depends on how yellow the white chocolate I’m using comes out.
These look amazing !! Your notes above say to make ahead – like 3 days – as the flavor gets better. So, just confirming , you glaze and then pipe the decorations and keep at room temperature for a could of days ahead of time ? Thanks for your time. I want to make these for a baby sprinkle.
Hey Babs!
yes! I found that the flavor develops and the coating hardens nicely so that they’re easily hand held after a day or two. So make ahead to your hearts desire.
yay! I’m so glad this worked well for you!
karlee
Hi. I’ll be making some early next week and I’d like to know if I can omit the corn syrup successfully?
Thanks!
Pingback: Say “I Do” to a Something Blue Bridal Shower: 9 Fresh Ideas
Hi, thanks for the recipe, just a quick question. Have you tried using almond bark for the glaze instead of the white chocolate chips?